
Web design client onboarding process (so projects don’t go off the rails)

If you’ve ever had a project go off the rails because of unclear expectations, delayed content, or a client who wasn’t quite the right fit – hello there! Me too! You’re not alone.
Most of us learn the hard way that a beautiful website isn’t just about great design. It’s about having the right process in place to support a smooth and collaborative working relationship from the very first enquiry through to launch.
That’s where onboarding comes in.
A good web design client onboarding process builds trust, sets boundaries, and gives your client the structure and support they need to show up fully for the project. It also protects your time and energy, so you can focus on the creative work you do best – without chasing content or having to constantly clarify what’s included.
In this article, I’m walking you through the exact onboarding process I use inside my website client process – from that first enquiry to the strategy call that helps clients actually get started. I’ve even included a handy website design client onboarding checklist to use as a step-by-step guide on your next project.
Table of Contents
What is a web design client onboarding process?
At its simplest, an onboarding process is the series of steps you and your client take from the moment they first express interest to the point where you’re ready to start work. It lays the foundation for your collaboration together:
First contact: When a potential client reaches out.
Qualification: How you decide if they’re the right fit.
Alignment: Making sure both parties understand scope, budget, timeline and responsibilities.
Official kick-off: Contract signed, deposit paid, welcome materials sent.
Preparation: Gathering assets – branding, photography, copy, tech stuff
Why a client onboarding process matters
Kicking off a new project can feel a bit daunting for everyone – your client might not know what to expect, and you don’t want to spend the first few days answering a million emails, chasing missing files or clarifying basics.
When done right an onboarding process will:
Save you time: Having a go-to sequence of steps (forms to send, calls to book, assets to gather) means you’re not reinventing the wheel each time and you’re pre-empting client’s needs and questions.
Avoid mismatches: Onboarding is your chance to confirm you and your client are a great match. You’re checking their budget, timeline, decision-making style, communication preferences and core values against how you love to work. That means no more half-hearted leads or projects that end up outside your sweet spot.
Define scope clearly and set boundaries: Spell out what’s included – and what’s not. A clear scope means neither side will wonder if that extra round of revisions or fancy custom animation was part of the deal.
Build trust and confidence: When you walk clients through a clear, welcoming process, they immediately feel like they’re in capable hands – and that peace of mind makes everything else smoother.
Get high quality content from the client: A website project is a collaborative partnership with your client and the outcome is dependent on them as much as on you. Being clear about who’s responsible for what –– written content, branding, photography – means that there’s no surprises when it’s time to begin design.
Keep things chugging along to the timelines: A shared schedule with key dates and payment milestones keeps the project on track –and stops any unwelcome “where are we at?” surprises.
Make communication easy: Decide up front on channels (email, Slack, Zoom), response times and preferred feedback formats. Clear boundaries around communication mean fewer “Did you see my message?” moments.
So, what does this actually look like in practice? Let’s take a look…
A quick aside: how do YOU want to work?
Before you start building out your onboarding steps, it's worth pausing to think about what you actually want your working life to look like.
You can run your web design studio however you like and in fact, finding a way that is supportive of your energy, your communication style and your preferred way of working means your business is going to be much more sustainable long term. It means you can show up more fully for your clients too, without the resentment or burnout that comes from working in a way that doesn't suit you.
(If you’re curious, I go into this in even more detail in this interview on creating a calm web design business as a highly sensitive website designer.)
So before we dive into the steps, here are a few questions worth sitting with:
How do you prefer to communicate with clients? Email only to keep everything in centralised space? Perhaps you love texting and voice messaging for a more relaxed back and forth. Maybe you're a fan of recording video walkthroughs to explain feedback or share progress (I love this one!). Or do you prefer jumping on phone or Zoom calls?
How available do you want to be? Are you happy to respond to client messages on weekends, or do you want a clear boundary around your days off? Do you want to be reachable by phone during business hours, or would you prefer all communication to come through email so you can respond in your own time? Setting your availability before a project starts – and communicating it clearly – means you're far less likely to find yourself answering messages at 9pm on a Sunday wondering how you got there.
How many revision rounds feels fair and sustainable to you? One round, two rounds, three? What's realistic given your timeline, your rates and the way you like to design?
What does your ideal project timeline look like? A focused one-week build, a more spread-out multi-week project, or something in between?
What are your non-negotiables? The things you won't compromise on – whether that's no weekend communication, content due before the build begins, or a deposit before you hold a calendar spot.
Knowing your preferences means you can build these into your web design client onboarding process from the start. In fact, these are exactly the things you want to communicate to your clients upfront, in your proposal and contract.
Once you've got clarity on those things, you're ready to build your process around them. Here's exactly how I do it in my studio.
Steps to include in your website onboarding process
01. The enquiry
I have a client enquiry form on my website that helps me and my clients start off on the right foot. It asks a handful of targeted questions to make sure we’re a good match and that their project falls within my sweet spot. For example:
Type of business
Package and budget
Timeline
How they found me (this is super useful for tracking which marketing channels bring the best leads)
Because only serious prospects tend to complete the form, it cuts down on random enquiries and saves a lot of time spent on sales calls that don’t go anywhere.
Once the form is submitted, clients can lock in a time for a chat via my automated booking system.
My favourite web design client onboarding touchpoints are the confirmation and reminder emails that go out immediately after booking. In them, I include:
A brief overview of my pricing structure
A note on how my one-week website model works
This primes clients up front – so they know if we’re a budget-fit and that my process is designed for a focused, week-long build.
P.S. If you’re curious about whether to display your prices on your own site, have a look at my blog post: Should I put my prices on my website?
02. The discovery call (aka the sales call)
The discovery call is a 45–60 minute chat that is part information gathering and part educating.
First up, I gather information from the client such as:
What they do, who they help, where they are located and what offerings they have
What goals they hope to achieve with their new website – how they want it to function, feel and perform
What budget and timeline they are working towards
This information helps me to determine what package is best for them.
Next up, I educate on the three ingredients needed for a successful website: branding, photography and copy. I ask where they currently stand with each ingredient and note any gaps – so I can tailor my proposal to include things like colour-palette selection, stock-photo curation or copywriting support as needed.
At the end of the call, if it’s a fit, I let them know they’ll receive a proposal with everything we discussed within the next 24 hours.
For a copy of my web design client onboarding questionnaire with the exact questions I ask in a discovery call checkout the website designer document toolkit.
03. The proposal
Once the sales call is complete and I know the project is a good fit, the next step is sending a detailed proposal. For me, the proposal plays two roles – it’s both a sales tool and a clarity document.
On one hand, it showcases my studio, communicates what makes my approach different from other designers, and reinforces the value of working with me. On the other, it clearly outlines exactly what the project will involve, so there are no surprises once we get started.
I always send the proposal within 24 hours of the sales call while the conversation is still fresh in the client’s mind.
The proposal outlines the inclusions and deliverables, the client’s responsibilities, timelines, key dates, pricing and payment structures, and how much time they’ll need to dedicate to the process. I also include things like how many rounds of review are included, what happens if they need more time, and what’s considered out of scope. I’ve found that being upfront about these boundaries early on saves a huge amount of back and forth later.
Proposal documents are also a chance to give potential clients a sense of what it’s like to work with you. So I include a section about me and my studio, my values, and some testimonials or results from past clients. It’s a reminder that I’ve done this many times before and that I have a proven process that works.
I also use the proposal to help the client assess whether they genuinely have the capacity to move forward. Sometimes people are excited about the idea of a new website but don’t realise how much involvement is required from them – especially when it comes to things like writing content.
By being transparent about what’s needed from their side, I help them make an informed decision about whether this is the right time to commit.
If you’re a designer reading this and want to see what this kind of proposal actually looks like, I include a copy of the exact one I use inside my web design document toolkit. It’s fully editable and you can adapt it to suit your own workflow and brand tone.
04. The contract
After the proposal has been accepted, the next step in my web design client onboarding process is sending the contract.
My contract is there to protect both sides. It outlines the full scope of work, payment terms, project timeline, and what happens if things fall off track.
To protect my time (and my mental load), I’ve added in things like:
Reschedule fees if a project needs to be pushed more than a few days
Late fees if content or feedback is significantly delayed
Clear boundaries around revision rounds, communication timelines, and out-of-scope work – all things you'll already have clarity on if you worked through those questions I asked earlier in this article.
At first, I felt nervous including these. But what I’ve found is that clients actually appreciate the clarity. It shows them I have a clear process, it sets expectations, and it gives them a framework to work within.
Most importantly, it means I can show up fully for their project and for my other clients, without burning myself out.
For other designers, I highly recommend looking at how your contract supports your workflow. Make sure it reflects your real-life boundaries and protects your schedule.
If you need help tightening yours up, I always suggest The Standout Squarespace Course (that’s an affiliate link BTW) – which covers – in amongst many things – important clauses to include in your contract as a web designer.
For sending contracts, I use Adobe Acrobat’s e-sign feature (included in the Creative Cloud subscription), which makes the signing process super smooth and professional.
And I’m very clear with clients: I won’t hold a spot in the calendar or begin any prep work until that contract is signed and returned. It’s a simple boundary, but it makes a huge difference to how the rest of the project unfolds.
05. Invoicing
When it comes to invoicing, my standard structure is a 50% deposit to secure the booking. I don’t hold a spot in my calendar or start any prep work until that payment has been received – and I’m very upfront about that from the beginning.
It might feel a bit firm if you’re used to being more flexible, but honestly, this one boundary has saved me from so many last-minute cancellations and unpaid admin time.
Requiring a deposit not only locks in the client’s commitment, it also protects your schedule. You’re making space for them in your calendar, often turning down other projects as a result – so it makes sense that your client commit financially to that space too.
The second 50% is due on the content due date (before the build begins). This might feel early if you're used to collecting final payment at the end of a project, but it’s been a total game-changer for me.
By collecting payment before the design week even starts, I never have to worry about chasing invoices after a website has launched. It also creates a really clean boundary: content and payment must be delivered in full before the design work begins.
This two-part payment structure has worked beautifully for years now. It supports healthy cash flow in my business, motivates clients to stay on schedule, and means that by the time I start designing, I can give my full focus to the creative process without financial distractions.
If you’re a designer who often finds themselves chasing final invoices post-launch (or waiting on deposits to lock in projects), I highly recommend giving this approach a go.
06. The welcome pack
Once the contract is signed and the deposit is paid, I send over the welcome pack – where I give the client everything they need to prepare for a successful project.
I break my welcome pack into two parts:
The Welcome Guide – which sets expectations and outlines the journey ahead
The Website Starter Kit – which includes all the practical tools they’ll need to deliver high quality content
The Welcome Guide

The Welcome Guide is a beautifully designed PDF that sets the tone for how we’ll work together. It includes all the key information your client needs to stay on track and feel supported, without overwhelming them.
It opens with a warm welcome and a quick recap of what we’re working toward – usually drawn from the goals we discussed during the sales call. From there, it outlines the project timeline in a clear, date-based format so clients know exactly what’s happening and when (I always suggest they add these key dates to their calendar).
It also sets the tone for how we’ll work together: what I’ll be doing, what I need from them, how we’ll communicate, and when I’m available. I also include a few tips for staying on schedule, and a simple checklist to help them start gathering what they need without feeling overwhelmed.
It’s there to give the client confidence that they’re in good hands, and to make the next steps feel manageable and well-paced. They know what’s expected of them and when, and they have a reference point to return to throughout the project.
The Website CONTENT PACK
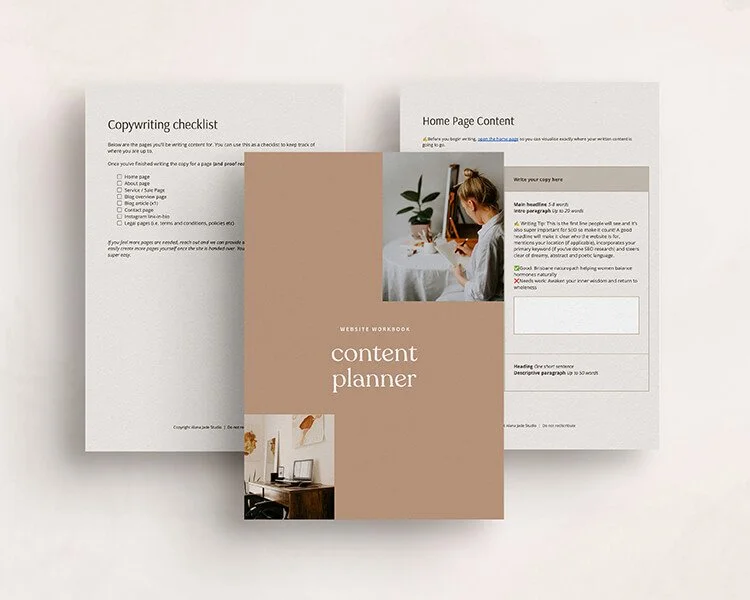
This is where things get practical. I include a full suite of website content gathering workbooks and resources to help the client create high quality content to get the best result for their website. This includes:
Content planners – designed to guide them through writing copy section by section, with tips and prompts for each page
Photography guidelines – if they’re organising a shoot, I share a list of recommended shots and a free training on how to prepare for their brand shoot.
Branding questionnaire – to ensure their brand assets (logo, colour palette, fonts) are complete
Technical questionnaire – so we have all the tech stuff, login details to setup the functionality needed on their new site
I’ve learned over time that the quality of a website is directly tied to the quality of what goes into it. If a client submits rushed copy, low-res images or unclear branding, it shows in the final result – no matter how strong the design.
But when the inputs are solid – thoughtful words, cohesive visuals, and professional assets – the outcome is not only more beautiful, it’s more effective. Clients end up with a site that delivers long-term value and feels genuinely aligned with their business.
A quick note on tools: I keep things deliberately simple and use Google Docs for all my content gathering templates. Most small business owners already know how to use Google Docs and Drive, which means there's nothing standing in the way of them getting started. Adding an unfamiliar platform into the mix is just another hurdle – and when clients feel overwhelmed by the process, they procrastinate. We all know where that leads.
I simply share a Google Drive folder and ask clients to save everything in one central location. Clean, familiar and easy for everyone.
If you'd like more detail on how to collect website content from clients, I've written about it in depth over here: How to get content from website design clients.
07. Schedule the check-in calls
I schedule multiple check-in calls with my client throughout the project – especially around key milestones like when content is due, during the website build week, and throughout the review period. These calls are short but they make a big difference to how supported the client feels (and how smoothly the project runs).
I book all of these calls in advance, as soon as the project is confirmed. That way, the client has everything clearly laid out in their calendar from day one, and we avoid the back-and-forth of trying to coordinate availability later.
08. The kick-off call
The kick-off call is one of the most important (and often underrated) parts of my web design client onboarding process. It usually takes place shortly after the welcome pack has been sent.
The main goals are to make sure the client feels confident, clear and supported as they begin preparing their content.
Receiving a stack of documents, planners and deadlines can feel overwhelming. And when overwhelm kicks in, procrastination usually follows – which is exactly what we want to avoid.
This call gives me a chance to check in on how they’re feeling about everything they’ve received, run through all the documents in their welcome pack, answer any questions and ease any anxiety they might be carrying about what’s expected of them.
This call only takes 30–45 minutes, but it’s such an effective way to get the project moving. By the end of it, the client usually feels far more in control and ready to dive into the prep work – rather than letting it sit untouched in their inbox.
And there you have it! My full onboarding process!
This seems like a lot...
Yeah – it can feel like a lot at first.
There are quite a few steps involved, especially if you're trying to make your process as clear and client-friendly as possible. But once it's all in place, it genuinely saves you time, energy and stress. You're not chasing missing information, managing mismatched expectations, or wondering if your client is on board with the way you work.
Instead, you're setting up a solid foundation—one where the client knows exactly what they need to do and when, where timelines are respected, and where both of you are working in sync.
When a client feels supported and clear, they’re far less likely to get stuck in procrastination or overwhelm. And that means a smoother project for everyone.
Web design client onboarding checklist
Use this web design client checklist as a working reference for every new project.
The enquiry
Enquiry form submitted and reviewed
Project type, budget and timeline confirmed as a good fit
Discovery call booked with client
Confirmation and reminder emails sent (including pricing and process summary)
The sales call
Client business, audience and offerings discussed
Website goals, desired look and feel noted
Budget and timeline confirmed
Status of branding, photography and copy assessed
Right package identified
Client advised proposal will be sent within 24 hours
The proposal
Proposal sent within 24 hours of sales call
Inclusions and deliverables clearly outlined
Client responsibilities documented
Timeline and key dates included
Revision and review process outlined
Out-of-scope work defined
Studio values, background and testimonials included
The contract
Contract sent for e-signature
Scope of work, payment terms and timeline included
Reschedule and late fees outlined
Revision rounds and communication boundaries included
Signed contract received before calendar spot is held and any prep work begins
Invoicing
50% deposit invoice sent
Deposit received before calendar spot is held and any prep work begins
Second 50% invoice scheduled for content due date
The welcome pack
Shared Google drive created to share project documents
Welcome Guide sent (project timeline, communication expectations, key dates)
Content planner included
Image checklist included
Branding questionnaire included
Technical questionnaire included
Client advised to add key dates to their calendar
Check-in calls
All check-in calls scheduled upfront
Kick-off call booked
Content due date call booked
Design week check-in booked
Review period call booked
The Kick-off call
Strategy call scheduled shortly after welcome pack is sent
All welcome pack documents walked through
Client questions answered
Client confirmed as clear and ready to begin content prep
Should I automate my web design client onboarding process?
In the beginning, I did everything manually – emails, scheduling, invoicing, you name it. I was weighing up whether the time spent doing things manually was actually more cost-effective than paying for a CRM or automation tool I wasn’t quite ready for.
And honestly, that was the right call at the time.
Manual systems can still be systems—especially if you’re using templates well. I used a web design onboarding checklist, email templates (the same ones I now include in the one-week website document toolkit), proposal templates, and Google Docs that I could duplicate and tweak for each project. It took just a few extra minutes, but the structure was still there.
Now that I’m further along, I’ve automated the scheduling part of my process using a booking tool, and I’m currently transitioning into a full CRM system to streamline things even further.
If you’re in the early stages, don’t feel like you need fancy software to have a solid process. Start with templates, checklists and manual systems that work for you. And when you’re ready to scale or want to create more ease in your admin, you can take those same templates and drop them straight into your CRM setup.
With a clear onboarding process, you’ll feel more in control of your projects, more confident in your client relationships – and more spacious in your business overall.
Templates to help you improve your client onboarding process
Grab a copy of these website design document templates which contain everything you need to improve your client process – from onboarding right through to handover.
Other helpful resources
You might also find these articles helpful as you refine your process:
Frequently asked questions about onboarding website design clients
-
Start by getting clear on how YOU want to work – your preferred communication style, availability, revision rounds and non-negotiables. These decisions become the foundation of your whole process. From there, a solid web design client onboarding process moves through a clear sequence of steps: an enquiry form to qualify leads, a sales call to understand the project and confirm it's a good fit, a detailed proposal, a contract, a deposit invoice, and then a welcome pack that gives your client everything they need to prepare. I also schedule all check-in calls upfront, and hold a kick-off call shortly after the welcome pack is sent to make sure the client feels clear and confident going into the prep phase. It sounds like a lot – but once it's in place, it runs smoothly and saves an enormous amount of time, back-and-forth and stress on both sides.
-
A solid web design client onboarding process covers everything from that first enquiry through to the moment you're ready to start the build. In my studio, that looks like eight steps: the enquiry form, the discovery call, the proposal, the contract, invoicing, the welcome pack, scheduling check-in calls, and the kick-off call. Each step builds on the last – so by the time design week arrives, both you and your client know exactly what's happening, when, and why.
-
A welcome pack is what you send a client once their contract is signed and deposit is paid. It gives them everything they need to prepare for a successful project. In my process, the welcome pack has two parts: a Welcome Guide, which is a beautifully designed PDF that outlines the project timeline, how we'll communicate, and what's expected of them – and website content collection pack which includes a content planner, image checklist, branding questionnaire and technical questionnaire. A good welcome pack means clients arrive at design week with everything ready to go, rather than scrambling at the last minute.
-
This comes back to what feels sustainable for you and in alignment with your timelines, rates and how you like to work. Whatever you decide though, it’s best to work this out before you get into a project and clearly outline this in your proposal and contract documents so the client is aware of this. You might also like to include clauses if they want additional review rounds – quoting a small extra fee if they go over the allocated review rounds can protect your bottom line while still giving the client options if they need further edits.
On a side note: it's also worth questioning whether revision rounds are even the right structure for your process. In my studio, I don't offer revision rounds on websites at all. Instead, I run a review period on a set day where my client and I are online at the same time and I make changes to the site in real time as their requests come through. Clients love seeing edits unfold right in front of them. Review / edit rounds can easily blow out and be hard to put boundaries around – which is why I don’t offer them.
Whatever approach you choose, the important thing is that you decide how it works before the project starts and communicate it clearly from the proposal stage onwards.
-
Yes – and I'd go a step further. I require a 50% deposit to secure the booking, and I don't hold a calendar spot or begin any prep work until it's received. The second 50% is due on the content due date, before the build even begins. This means I'm never chasing invoices after a site has launched, and it gives clients a clear financial commitment that keeps them motivated to stay on schedule. If this feels firm, remember: you're often turning down other projects to make space for theirs. It makes sense that they commit to that space too.
-
Absolutely. A contract protects both you and your client by spelling out the full scope of work, payment terms, timelines, and what happens if things go off track. In my contract, I include things like reschedule fees if a project gets pushed, late fees if content or feedback is significantly delayed, and clear boundaries around revision rounds and out-of-scope work. I was nervous about including these clauses at first – but what I've found is that clients actually appreciate the clarity. It shows them you have a real process, and it gives everyone a framework to work within.
-
It depends on where you're at in your business. In the early days, I did everything manually – and that was the right call at the time. Manual systems can still be systems, especially if you're working from solid templates. I used email scripts, checklists, proposal templates and Google Docs that I could duplicate and tweak for each project. Now that I'm further along, I've automated scheduling and I'm transitioning into a full CRM. My advice: start with templates and a clear process. When you're ready to scale, you can take those same foundations and drop them straight into whatever system you choose.
-
Two things make the biggest difference here: giving clients the right tools, and following up with a kick-off call. In my welcome pack, I include a full website content pack – a content planner, image checklist, branding questionnaire and technical questionnaire – so clients know exactly what they need to gather and in what format. Then, shortly after sending the welcome pack, I hold a 30–45 minute kick-off call to walk them through everything, answer questions, and ease any anxiety. By the end of that call, most clients feel clear and ready to get started, rather than letting the documents sit untouched in their inbox. Read more on how to get content from website clients.
-
They serve two very different purposes. The discovery call – which is a sales call – happens before the contract is signed. It's where I gather information about the client's business, goals and budget, educate them on what goes into a successful website, and determine which package is the right fit. The kick-off call happens after the welcome pack has been sent. At that point the project is confirmed, and this call is purely about making sure the client feels confident and clear as they begin preparing their content.